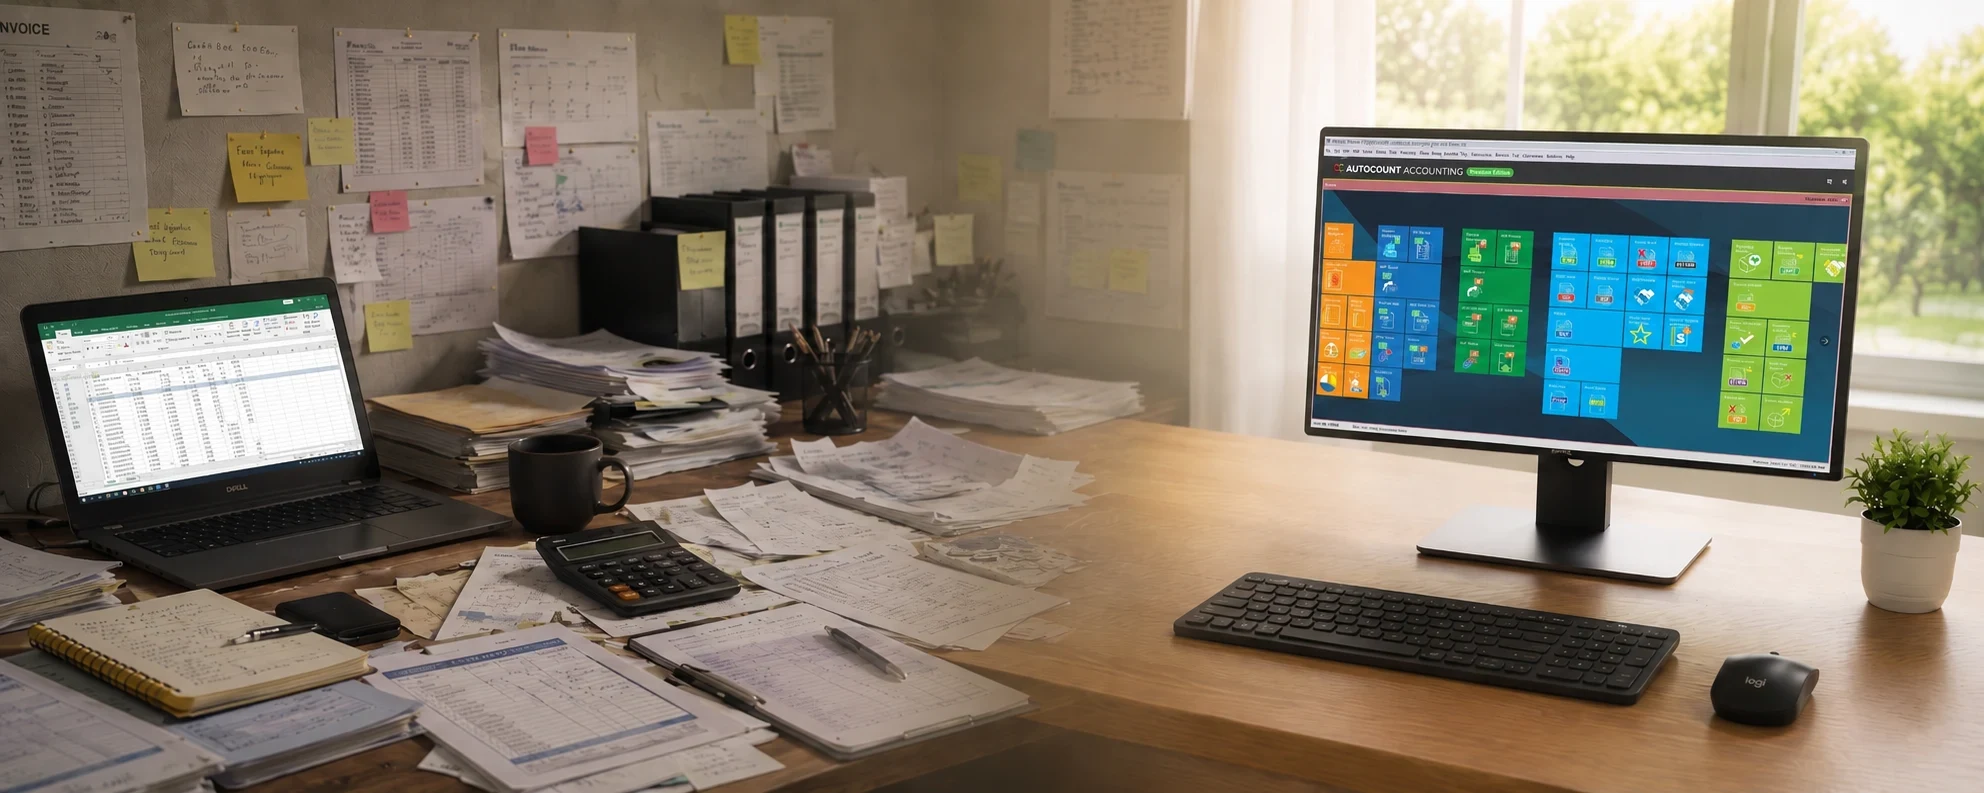

Setup Sequence & AutoCount Menu
Download the plugin package (.app) from the Download Plugin button above. In AutoCount Accounting, go to Tools > Plug-In Manager, click Install, and select the downloaded file to install the plugin. After installation, a new DKSH Integration menu appears on the menu bar. The menu items are organized in the exact order of setup — simply follow the sequence from top to down:
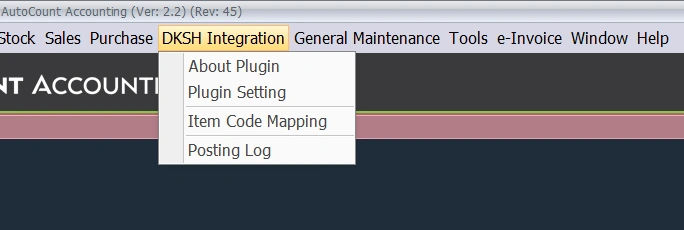
DKSH Integration menu: About Plugin, Plugin Setting, Item Code Mapping, and Posting Log
Access Right Settings
DKSH Integration connects natively with AutoCount Access Rights Maintenance. The ADMIN user is granted full access rights by default.
Steps to Configure Access Rights in AutoCount
- Open Plugin Setting: Restricts access to sensitive integration configuration.
- Open Item Code Mapping: Restricts access to AutoCount-to-DKSH item code mappings.
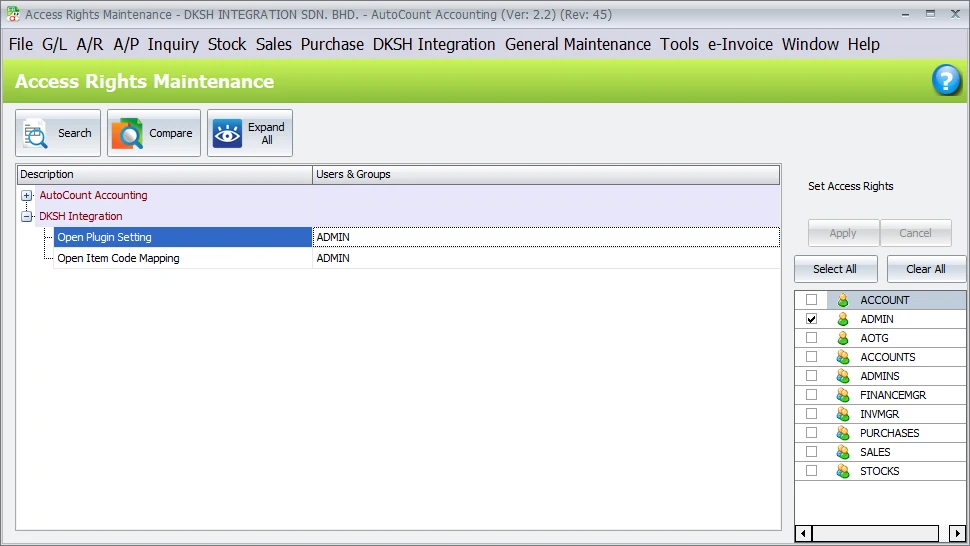
AutoCount Access Rights Maintenance: Configure permissions for Plugin Setting and Item Code Mapping
About Plugin & License Activation
Go to DKSH Integration > About Plugin to view plugin details, inspect dealer information, and activate or update your license.
Activation Steps
💡 Auto-Updates: Clicking "Get Online" automatically updates the Plugin and Windows Background Service to the latest versions.
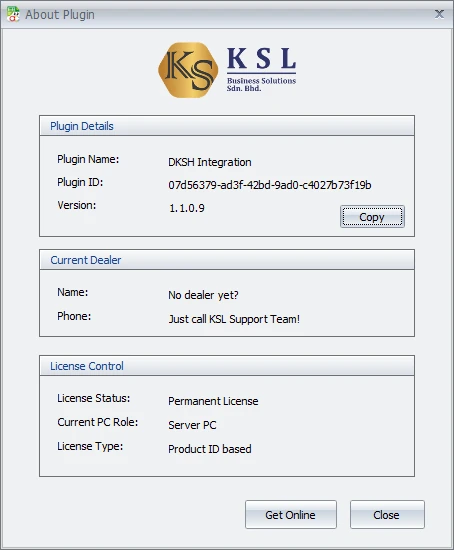
About Plugin: License details, dealer verification, and Get Online activation
Pricing & Coverage
- Permanent License: One-time payment.
- Product ID-Based: Covers all account books under your AutoCount Product ID.
- Contact KSL Support Team or your AutoCount dealer for a formal quotation.
No Trial Available
DKSH Integration connects directly to live distributor APIs requiring authenticated DLP tokens issued by DKSH Malaysia. Consequently, evaluation trials are not supported.
License Transfer
Transferring your license to a new server or upgraded PC is permitted. Contact the KSL Support Team for migration support.
Plugin Setting & Sync Schedule
Go to DKSH Integration > Plugin Setting to configure API credentials, agency item filters, and background posting schedules.
API Credentials
- API Base URL & DLP Token: Enter endpoints and confidential tokens provided directly by DKSH.
- Distributor Code: Enter your designated DKSH distributor code.
Selective Filtering & Scheduling
- Filter by Item Group / Type: Sync agency products only, automatically excluding non-DKSH company inventory.
- Adjustable Posting Schedule: Activate background syncing and configure the upload interval from every 1 to 15 days at a specific time (default: daily at 7:00 PM).
- Posting Log Retention: Configure how many months (1 to 120 months) historical posting records are kept. Older logs are automatically deleted to optimize database size.
💡 Tip: Schedule during off-peak hours to keep system performance smooth, and ensure the Server PC remains turned on for background syncing.
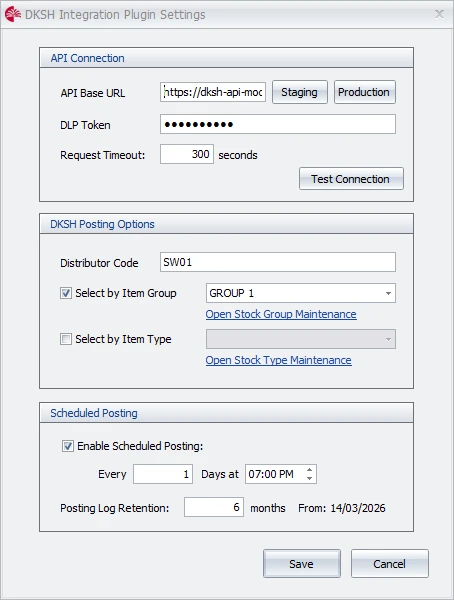
Plugin Setting: API credentials, agency item filters, and configurable posting schedule
Item Code Mapping & Excel Import
Go to DKSH Integration > Item Code Mapping to match AutoCount stock item codes with official DKSH material codes.
- Smart Fallback: Leave blank if your AutoCount item code matches DKSH's product code — the plugin defaults to using the AutoCount code.
- Excel Bulk Import & Export: Export catalog to Excel (
.xlsx), edit DKSH codes offline, and import with automatic format validation. - Item Group Filter: Filter by Stock Item Groups (e.g. Pharma, Consumer, Surgical) for quick navigation.
⚠️ Base UOM Requirement: DKSH agency items must use their smallest Base UOM in AutoCount. DKSH requires whole-number quantities and will reject fractional units.
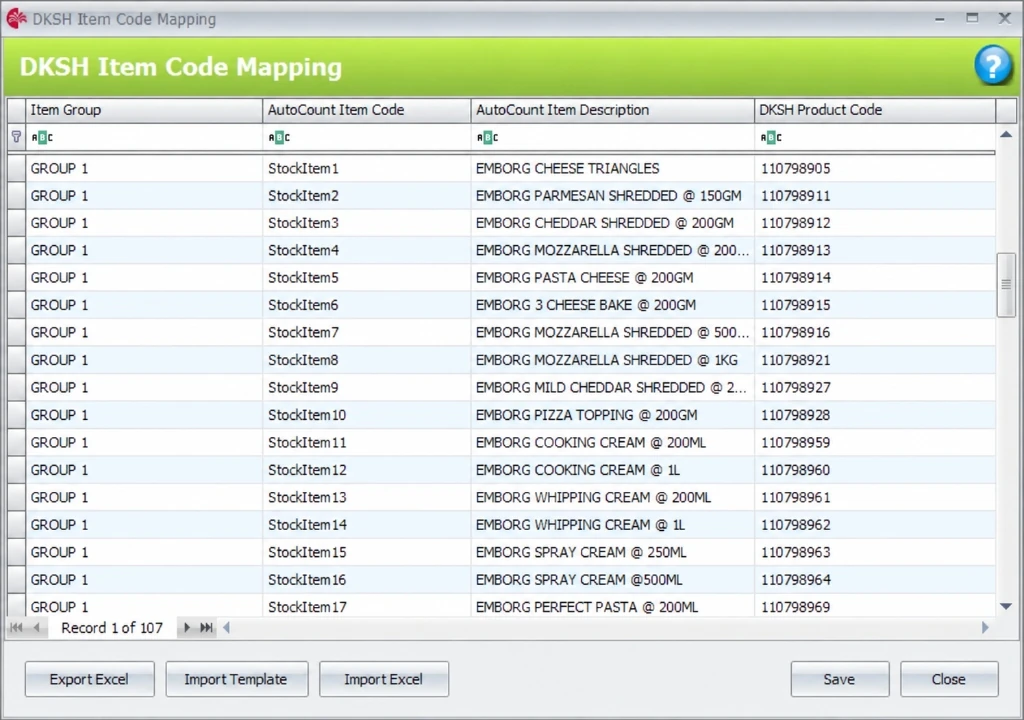
Item Code Mapping: AutoCount to DKSH product code mapping with Excel import
DKSH Posting Log
Go to DKSH Integration > Posting Log to track the real-time status of every sales invoice and credit note submitted to DKSH.
Dashboard Tools & Operational Controls
Document Filter Options
- Document Date Range: Query transactions across any custom calendar period (defaults to the past 2 months).
- Document Type Selectors: Selectively check Invoices, Credit Notes, or both to focus on specific transaction workflows.
- Inquiry & Reload: Click Inquiry anytime to query and reload documents matching your active filter criteria.
Manual Sync
- Post Last 15 Days: Click the manual sync button anytime to push the past 15 calendar days immediately on demand.
Categorized Document Workflow
- Pending: Lists newly created or amended Invoices and Credit Notes waiting for the next automated background sync cycle.
- Succeeded: Displays successfully transmitted records with the official DKSH reference number and timestamp proof.
- Failed: Isolates rejected documents highlighted in red so you can resolve errors without sifting through successful data.
Direct API Error Inspector & Drilldown
- Direct Error Inspector: Click any failed row to inspect the raw, unvarnished HTTP error response returned by DKSH.
- Double-Click Drilldown: Double-click any row to immediately open and edit the source Invoice or Credit Note in AutoCount.
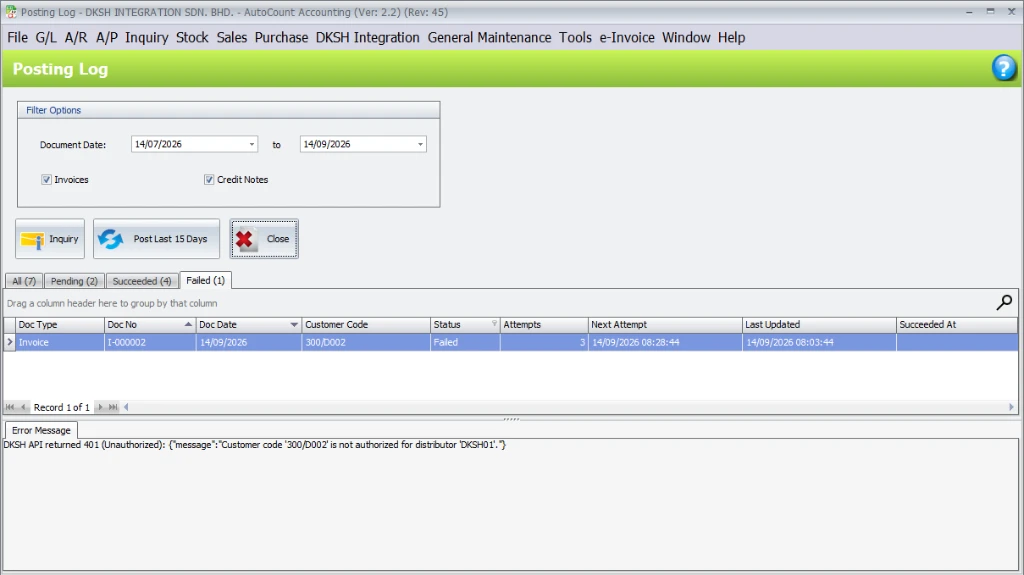
DKSH Posting Log: Real-time sync status, error diagnostics, and manual sync
Built-in Data Safeguards & Smart Automations
Automated background checks protect your daily sales and accounting records and ensure seamless synchronization with DKSH without manual rework:
Automatic Unit Conversion & Item Grouping
Sell in cartons, packs, or loose units — the plugin automatically converts quantities into DKSH's required base unit and merges matching items into clean totals before syncing.
Backdated Document Warning
Alerts your staff immediately upon saving if an Invoice or Credit Note is dated beyond 15 days ago, so backdated sales entries are never accidentally missed.
Reliable Server Sync & Auto-Retry
Runs quietly in the background on your server without slowing down daily invoicing and accounting entries. If your internet connection drops, it automatically retries later without duplicating records.
Ready to automate your DKSH sales synchronization?
Contact KSL Support Team for licensing, setup assistance, and end-to-end implementation across Malaysia.